

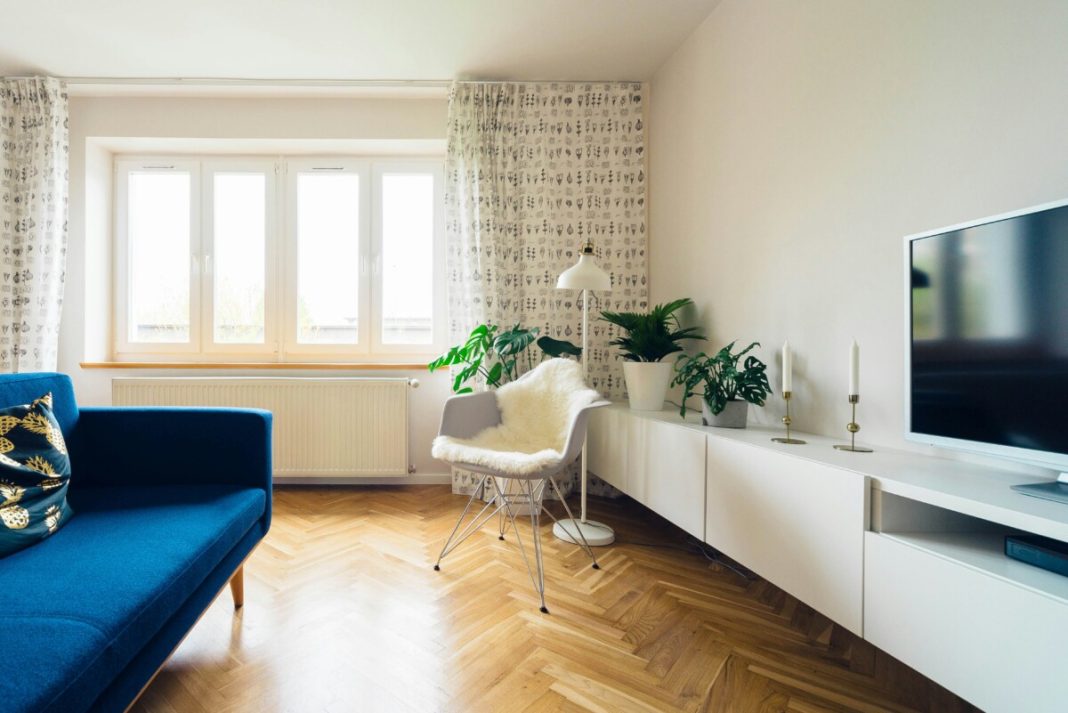

Whether you’re selling a two-bedroom townhouse in Tulsa or your family home in Fresno, great listing photos do more than document your home – they help buyers picture a life there. But the thing many sellers overlook is that they play a major role in prepping their house for the photoshoot that will ultimately help sell their home.
Below is a detailed breakdown of the main things you need to consider when preparing your home for your real estate photographer.
Start with a buyer’s perspective
Most home searches begin online, where photos have only seconds to make an impression. The goal isn’t to make your home look sterile or unrecognizable; it’s to make its best features stand out from the first glance.
“The easiest way I tell homeowners to prepare a home for photography is to make it feel like someone lives there, without feeling lived in. Think about a nice hotel room. Everything has a place. It’s clean, comfortable, and inviting. My general rule is: if it doesn’t add value to the space, take it out. You don’t want the home to feel empty. You want it to feel intentional.” – Corey Kline of Corey Anthony Photography
Walk through the home as if you were seeing it for the first time. What catches your eye? Is the view from the living room visible, or blocked by an oversized chair? Does the kitchen look spacious, or do small appliances and paperwork crowd the countertops? Is there a focal point in each room?
Use this walk-through to make a room-by-room preparation list. Start with the spaces likely to be photographed: the front exterior, entryway, living room, kitchen, dining area, primary bedroom, bathrooms, backyard, and any standout amenities, like a finished basement, office, deck, pool, or workshop.
Declutter before you deep clean
Decluttering is often the most important part of preparing a home to be photographed. Even a clean home can appear cramped or distracting in photos if every surface is full. Removing excess items lets room dimensions, natural light, storage, and architectural features take center stage.
“Prep is mostly subtraction. Pull cars out of the driveway, hide trash bins, coil the hose, and take the magnets off the fridge. Turn on every lamp and overhead light and open all the blinds to the same height, since mismatched blinds are the single most common thing we end up fixing in post. Have pets and their bowls, beds, and litter boxes out of the house before we arrive, not moved room to room while we shoot. If you do nothing else, do the counters and the blinds. That makes most of the difference between a listing that scrolls past and one that gets saved.” – Willis Aybar, Co-Owner of Open Doors 360
Prioritize high-visibility areas first:
- Clear kitchen counters of appliances, mail, dish racks, food containers, cleaning supplies, and pet items.
- Put toiletries, medications, toothbrushes, makeup, razors, and hair tools away in bathroom cabinets or a temporary storage bin.
- Remove laundry baskets, hampers, exercise equipment, children’s toys, remote-control collections, and stacks of magazines.
- Empty or hide trash and recycling bins throughout the home.
- Tidy open shelving so it feels curated rather than crowded.
- Remove refrigerator magnets, calendars, family artwork, and notes.
- Store pet bowls, crates, beds, litter boxes, toys, and feeding supplies before the shoot.
If you need a simple rule for deciding what stays, ask: Does this item help show the room’s size, function, comfort, or style? If not, store it temporarily.
A few carefully chosen accessories can still add warmth. A folded throw on the sofa, a bowl of fruit on the kitchen island, fresh towels in the bathroom, or a small plant on a shelf can help a room feel finished. The key is restraint.
Depersonalize without making it cold
Buyers need room to imagine their own belongings, routines, and memories in a home. Personal items can unintentionally interrupt that process, while also revealing more about yourself or your household than you may want to share publicly.
“If a home is too personalized, it can hinder that imagination, so we recommend removing personal photos, highly stylistic furniture, and unique personal items. Hiring a professional home stager is incredibly helpful because they maximize the purpose of each room for buyers and notice personalization you might overlook after living there so long.” – Josh Phoenix, Co-Founder of Phixer
Family photos, school schedules, name plaques, diplomas, children’s artwork, political materials, and personal collections should be packed away before photography. This is also a good time to remove valuables, sensitive documents, prescription medications, and anything that could disclose identifying information.
Depersonalizing does not mean stripping every room bare. Instead, aim for broadly appealing decor that highlights the room. Neutral bedding, simple art, fresh greenery, and a few tasteful accents can support a polished look without making the space feel generic.
“Getting your home ready to put on the market can be daunting. That’s especially true if you are still living in it. Buyers want to see how they fit into your home. Taking down family photos and mementos helps protect your privacy and helps buyers envision themselves in the space better. If your home is vacant, the power of staging cannot be overstated. A talented stager can really make a property sing!” – Matt Sansone, Photographer at SLO Photos
For a vacant home, staging can be especially valuable. Empty rooms may technically look larger, but they can also make it difficult for buyers to understand how furniture fits or how an awkward area might function. Even partial staging can clarify a room’s purpose, highlight a focal point, and help to create an emotional connection.
Make every room photo-ready
Once clutter is under control, clean with a camera-ready mindset. Professional photography captures details that may fade into the background in day-to-day life, including smudges on stainless steel, fingerprints on windows, uneven curtains, dusty vents, and loose cords.
“Plan to clean your property from outside to inside. Take photos with your phone before and after as you may have become blind to the eyesores in and on your property. The photos will bring issues back to mind. If you can see it with your mobile phone photos, it will stand out in professional photos.” – Photographic Artist, Rashad Penn
Taking phone photos is a smart way to check your work. Stand in doorways and corners, where a photographer may position the camera, then review what appears in the frame. You may notice that a rug is crooked, a lamp shade is tilted, the bed needs tighter linens, or a countertop still has too many items.
Use this room-by-room checklist before the shoot:
| Area | What to do before photos |
| Entryway | Remove shoes, coats, umbrellas, packages, and visible pet supplies. Add a simple doormat or plant if appropriate. |
| Living room | Clear pathways, straighten pillows, conceal cords, dust surfaces, and remove extra furniture that blocks windows or focal points. |
| Kitchen | Clear counters, polish appliances, hide dish soap and sponges, empty the sink, and make sure cabinet fronts are clean. |
| Dining room | Clear the table or use a minimal place setting. Straighten chairs and remove bulky furniture that limits movement. |
| Bedrooms | Make beds with neat, neutral linens, clear nightstands, hide laundry, and remove under-bed storage if visible. |
| Bathrooms | Close toilet lids, remove toiletries, hang fresh towels, clean mirrors, and clear counters and shower ledges. |
| Home office | Hide paperwork, cables, printers, and personal items. Make the workspace clearly readable as an office. |
| Laundry room | Put away detergent, baskets, ironing boards, and clothing. Wipe down appliance surfaces. |
| Garage and storage areas | Declutter enough to show useful square footage and storage potential, especially if the space is a selling point. |
Create clear sightlines and good light
A listing photographer needs room to work. Wide-angle images are common in real estate photography, and crowded layouts can make a room feel smaller or harder to understand.
“We always recommend clearing a clean sightline through the main living space and pulling furniture slightly off the walls so a wide, standout shot is possible. Be sure not to overlook the small details: a stray cord, a full trash can, or dishes in the sink are the things that quietly cheapen an otherwise beautiful photo and home.” – The Team at Doorbell
Start by opening routes through your major rooms. You should be able to look from the entry into the living area, from the living room toward major windows or the backyard, and through the kitchen without visual obstacles. If a bulky ottoman, extra chair, or decorative piece blocks the strongest view, move it out temporarily.
Pulling furniture slightly away from walls can also create more depth and make a layout look intentional. That doesn’t mean rearranging the whole house. Small changes – centering a sofa beneath a window, straightening dining chairs, using layered lighting, or shifting an armchair away from a corner – can help a photo feel more balanced.
Don’t overlook curb appeal
Exterior photos often serve as the listing’s lead image, so prepare the outside with the same care as the interior. Start several days ahead if possible, particularly if your landscaping needs mowing, trimming, weeding, or seasonal touch-ups.
Move vehicles away from the driveway if you can. Store garbage and recycling bins out of sight, coil hoses, put away yard tools, and remove children’s toys, pet waste, portable sports equipment, and visible maintenance supplies.
Then focus on the details buyers will notice in a wide exterior shot:
- Mow the lawn, edge walkways, and remove weeds from beds and cracks.
- Sweep the porch, driveway, deck, patio, and sidewalks.
- Clean the front door, exterior light fixtures, house numbers, and mailbox.
- Straighten outdoor furniture and cushions.
- Remove dead plants and replace them with fresh, healthy greenery if needed.
- Skim pools, clean outdoor kitchens, and uncover attractive features such as fire pits or seating areas.
- Check that gates are closed, fences look orderly, and shutters or exterior elements are aligned.
If the property has a patio, deck, balcony, or backyard entertaining area, style it simply. A neatly arranged outdoor dining set, a few clean cushions, or a subtle planter can help buyers see the lifestyle potential without creating visual clutter.
>>Read more: How to Stage Your Outdoor Space to Sell Your Home Faster
Have a day-of plan
The final hour before a shoot is often where small oversights happen. Build in extra time so you are not trying to vacuum, relocate pets, and answer the door all at once.
On photo day, complete a final walkthrough with your phone. Check countertops, blinds, beds, bathroom mirrors, trash cans, cords, and outdoor areas. Confirm that every light works and that window coverings are set consistently.
If possible, plan to leave the property during the shoot with children and pets. This minimizes distractions and keeps belongings from being shifted from one room to another as each area is photographed. Bring pet supplies, food bowls, beds, and litter boxes with you rather than hiding them in a room that may later need to be photographed.
A well-prepared home tells buyers that the property has been cared for – and makes it easier for them to focus on the features that matter most. By cleaning thoroughly, removing distractions, creating clear sightlines, and adding just enough warmth, you can help your listing photos stand out in a crowded search feed.